You need to set Internet Protocol Version 4 (TCP/IPv4) Properties to obtain IP address automatically along with obtain DNS server address automatically from Network Adapter settings of Windows PC.
You can also set to obtain IP address automatically in Mac by configuring IPv4 settings from Network preferences.
A DHCP server must be enabled in your network to get IP address assigned automatically. Otherwise, you need to ask your network administrator and manually set parameters.
Related: How to find default gateway IP address in Windows
In Windows 10
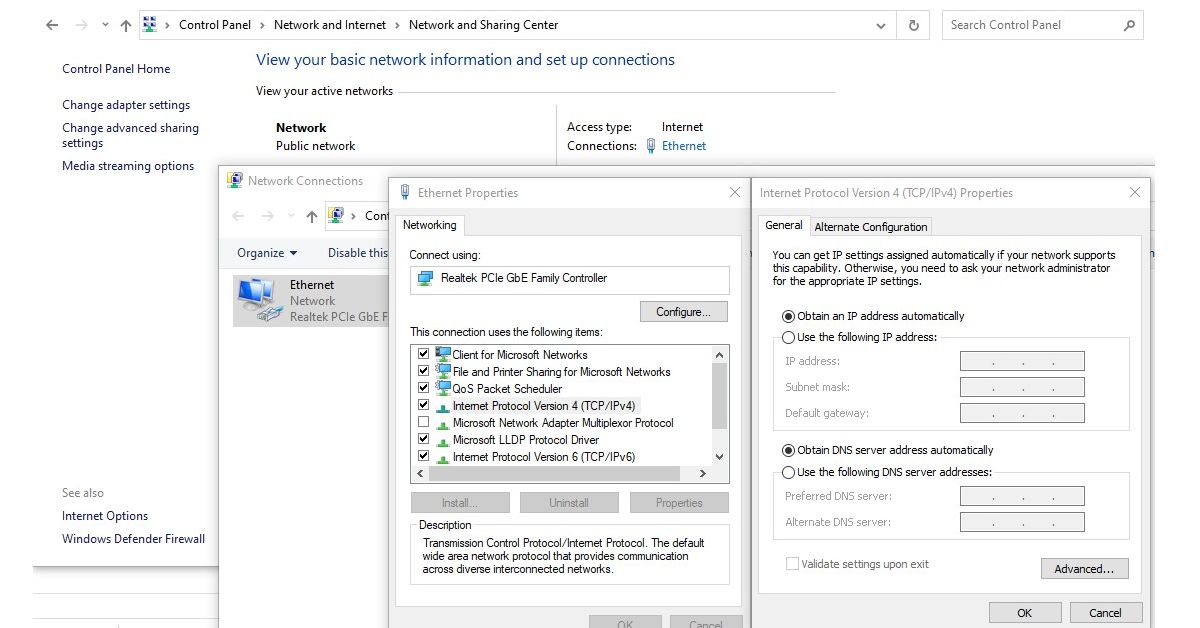
- Go to Network adapter settings by typing ncpa.cpl in the search bar and press enter. Or go to Control Panel > Network and Internet > Network and Sharing Center > change adapter settings.
- If you see multiple network adapters, choose which you need to set and right click it, select and click properties
- Select Internet Protocol Version 4 (TCP/IPv4) from the item list then click Properties
- From the General Tab, you would see several radio buttons. Tick obtain IP address automatically as well as obtain DNS server address automatically.
- Click OK and close to exit.
In Macintosh
- Click Apple Menu at the upper left portion of the screen. Select and click System Preferences.
- Click Network icon, it will show you list of Network adapters. Select from Wi-Fi or Ethernet
- Click Advanced…, Under TCP/IP tab, Configure IPv4 to Using DHCP from the options.
- Click OK to save.
In Linux
- Open the root shell and run nmtui tool command
- From the Network Manager select Edit a connection and press enter
- Select the NIC or Network adapter from the left pane on which you want to obtain IP address automatically. Then select Edit and press enter key.
- In the connection profile you will see several options. From IPv4 configuration the default value is Automatic
- Select Automatic then change it into Manual to obtain IP address from DHCP server, press enter key.
- You may select show on the right pane to view current configuration
- Select OK then Quit to exit.